Conversation Hightlights
Key concepts, highlights, recepies and resources that were presented on our live show on October 20th 2020
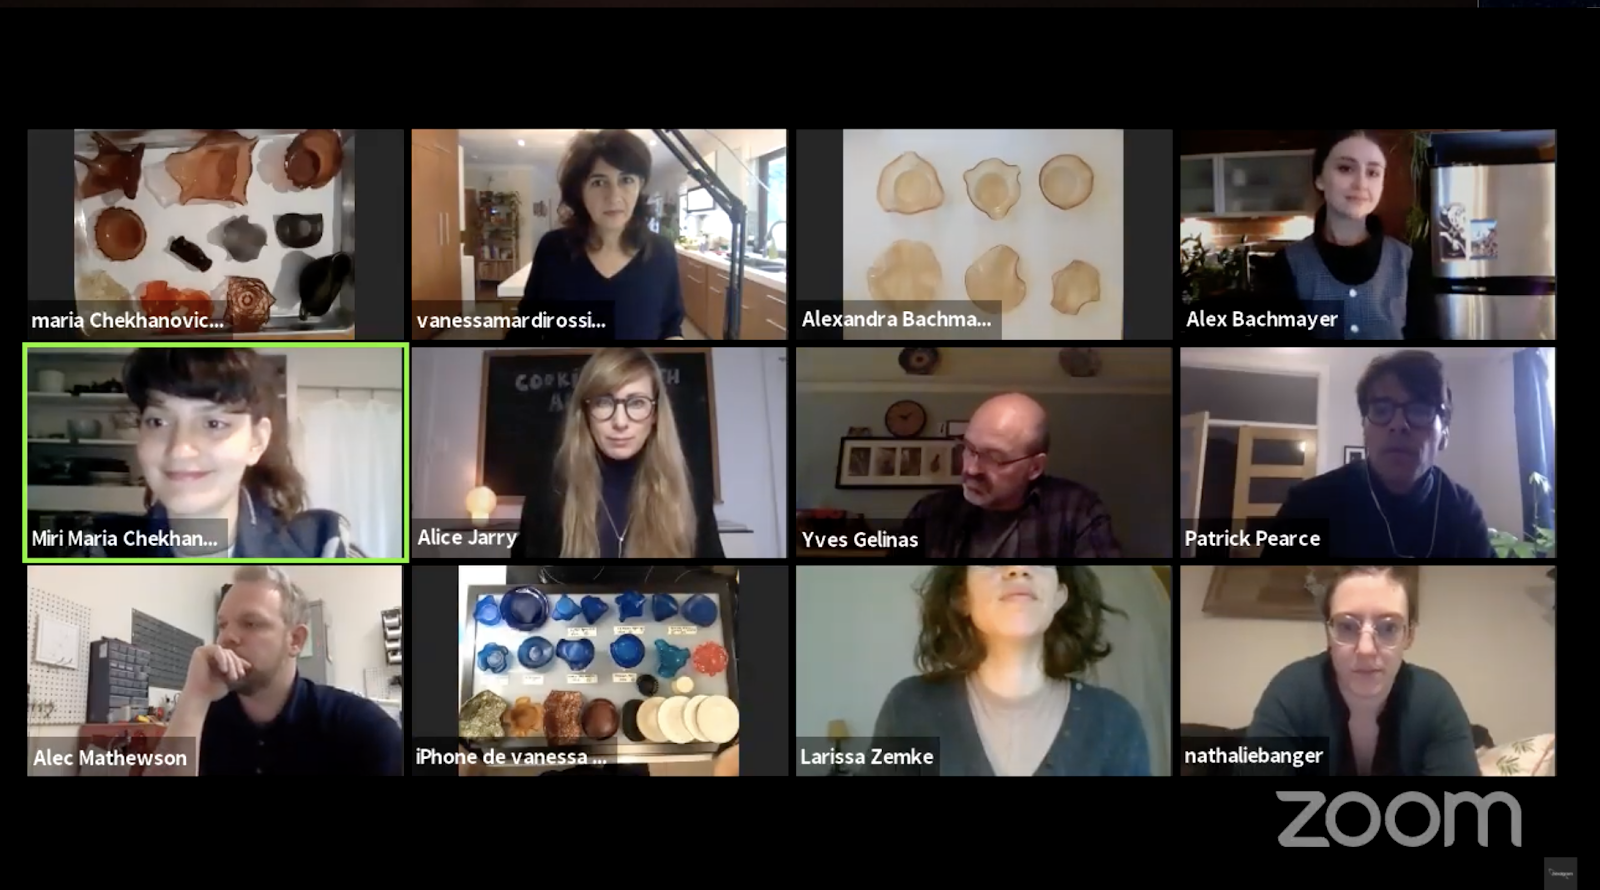
As promised during our Live Cooking Show—which took place on October 20th from our respective kitchens—below you’ll find a summary of some key points from the event as well as some answers to your questions.
Our recipes are inspired by the open-source website materiom.org. Founded by Alysia Garmulewicz and Liz Corbin, the Materiom community has promoted the sharing of sustainable material discoveries since 2016. It is wonderful to see how the worldwide interest in biomaterials is rooted in DIY and open source culture. There are also many other artists, researchers, and designers who are sharing their inspiring bioplastic and biocomposite work in online publications. To name a few:
- Margaret Dunne—https://issuu.com/nat_arc/docs/bioplastic_cook_book_3
- Stanford University summary—http://stanford.edu/~dsull/Making_Bioplastics.pdf
- Tiare Ribeaux—Bioplastic Cookbook for Ritual Healing from Petrochemical Landscapes—http://bioplastic-cookbook.schloss-post.com/
We founded our research collective Cyclical Matters as part of the Sympoïétiques project at the beginning of the year. Alice Jarry invited us to set-up a live research / creation station and to create tableware for the in-person conference. When the pandemic hit and we were forced to reimagine how we could contribute to an online conference, we decided to keep working together in our kitchens over Zoom and explored different digital research methods that we could all contribute to.
We chose the name Cyclical Matters because we are motivated by the potential for long-term reuse of bioplastics—by the cyclical potential of these materials. Part of our research includes how to reuse the base material indefinitely—or, at least, as indefinitely as possible—in order to produce new objects while avoiding the generation of waste. One step in this process was to develop techniques for storing bioplastics for future use. In our notes, we often refer to our stored bioplastics as 2nd generation, 3rd generation, etc.
Brick method: melt down your bioplastic samples in a pan and pour them into a small yet deep silicone mould. Let them set completely for a day or two before removing. As it dries and shrinks, make sure to check for mould. Because the material is thicker in this form, it takes a bit longer to completely dry than a flat sheet or yogurt lid.

Flake method: with this method you have two options (1) if your existing bioplastic is thin enough and not mouldy, you can chop it up with a pair of scissors and put it straight into a jar (2) if the bioplastic you want to save for reuse is too thick to cut up with scissors, it’s best to melt it down—with a little additional water and glycerine—and let it dry in a thin sheet. I love using a silicone roulade mat or a big flat piece of glass. A clean sheet pan or large baking dish also works fine. Once your thin sheet is completely dry, cut it up into small flakes using scissors and store it in a jar with a lid.
Freezer method: If you have enough space in the freezer you can simply put your bioplastic leftovers in a sealed bag and freeze it. This will help keep the material from molding. Before re-cooking, make sure you thaw the material to remove extra water that might have been added in the freezing process.
Our bioplastics and biocomposites are primarily coloured using food waste, natural plant dyes, and occasionally food coloring. Experimenting with natural colours allows us to reflect on the idea and necessity of waste and grounds us in new colour-creation temporalities and seasonalities. It compels us to think about how many onions we need to consume in order to have enough skins for a batch of onion dye. It forces us to plan what we’re going to plant in the spring or where we can harvest potential pigments in our neighbourhoods. Sometimes we have to think weeks or even months in advance.
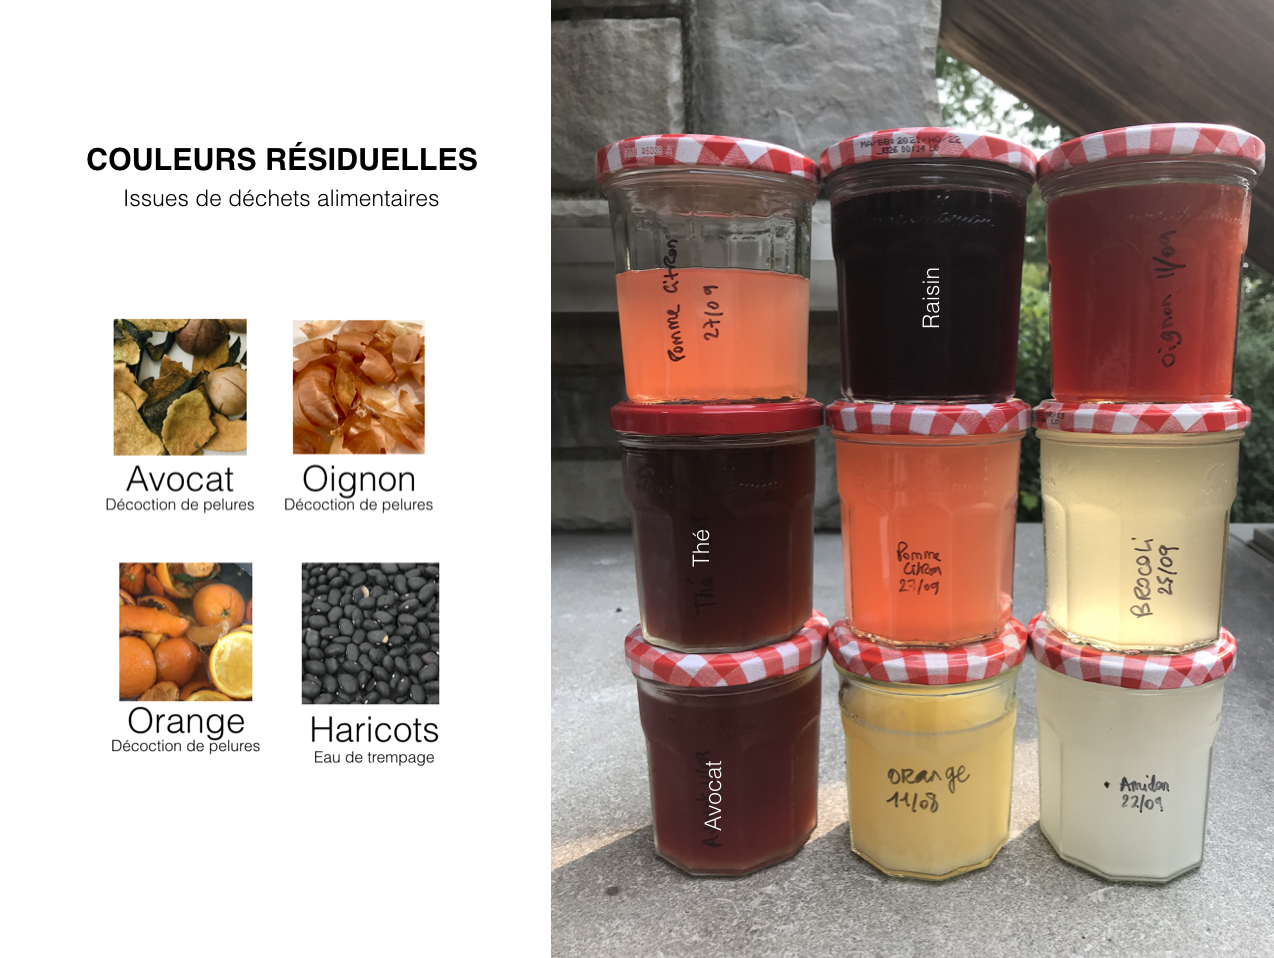
Recipe for onion dye:
Collect your own onion skin or ask your favorite restaurant to keep them for you. Boil them for an hour (90g of skin for about 5 litres of water). Sieve them. Your dye is ready to use. Just replace the amount of water by the same amount of liquid dye.
Recipe for avocado dye:
Collect your own avocado pits and skin or ask a sushi restaurant to keep them for you. Boil them for an hour (90g for about 5 litres of water). Sieve them. Your dye is ready to use. To play with opacity you can also grate a raw avocado pit and add it to the mixture. Just replace the amount of water by the same amount of liquid dye.
Recipe for orange dye:
Collect your own orange peel. Boil them for an hour (90g of skin for about 5 litres of water). Sieve them. Your dye is ready to use. Just replace the amount of water by the same amount of liquid dye. You can also experiment with using half natural dye/half water or another ratio that you prefer. Keep in mind that your colour is likely to change and evolve over time, especially if you are working with homemade natural dyes. This pigments are almost more photosensitive and will probably lose their colour more quickly if left in direct sunlight.
On the platform we mostly shared recipes using gelatine—an animal-based protein produced as a byproduct of the meat industry (primarily the skin and bones of pork). We chose this natural polymer because it is stable and doesn’t shrink as much as agar—a algae-based polymer. Two of our collective members are vegetarian and it was important for us to achieve reliable results with animal-free ingredients.
We chose to cook an agar-based bioplastic as part of our live cooking show to expand your repertoire and give you options depending on what material qualities you’re looking for. It is important to note that many different brands of agar exist and they all give slightly different results in terms of texture and plasticity. Their material qualities are subject to change as the sources and the extraction processes vary. As Yves Gelinas mentioned, it can be challenging to achieve a consistent product.
Exploring new materiality is helping us embody a more flexible mode of being and making. It forces us to stay attentive and to expect surprising results. As we become more independent in our production of “everyday” objects, we are forced into a more flexible and undetermined mindset.
Sourcing the materials:
Glycerine is a clear and odorless liquid that can be found in any pharmacy. Keep in mind that glycerol and glycerine are the same thing. We found the cheapest is a large 4L format from Coop Coco—here is the link to purchase.
https://coopcoco.ca/en/oil/glycerin-vegetable-source-USP?gclid=Cj0KCQjwuL_8BRCXARIsAGiC51CGe8vXcFrznp_E3sXnI3vI6AgzU6wF0lZjxOBH6nY8Niyg8yydWrgaAnU7EALw_wcB
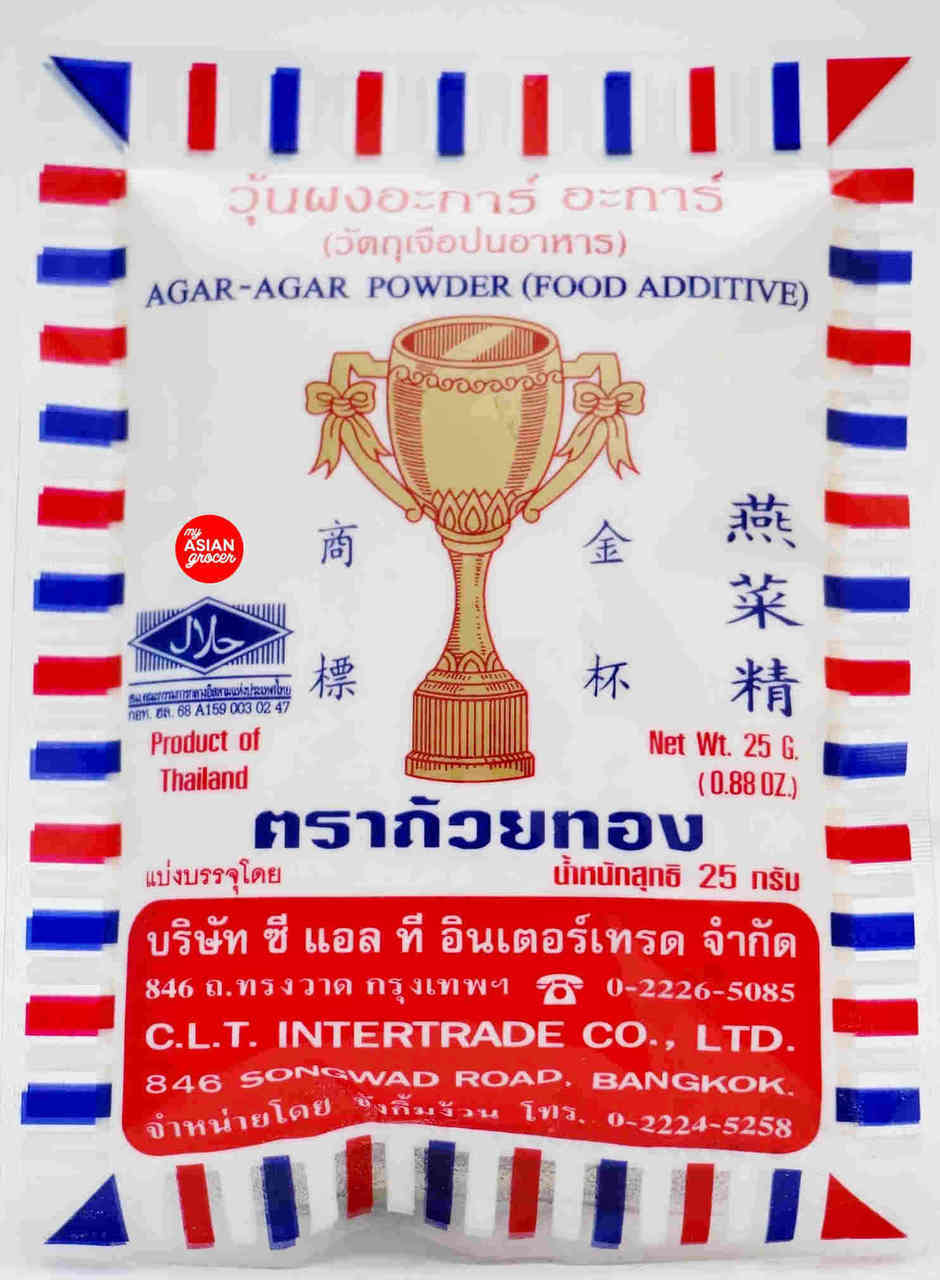
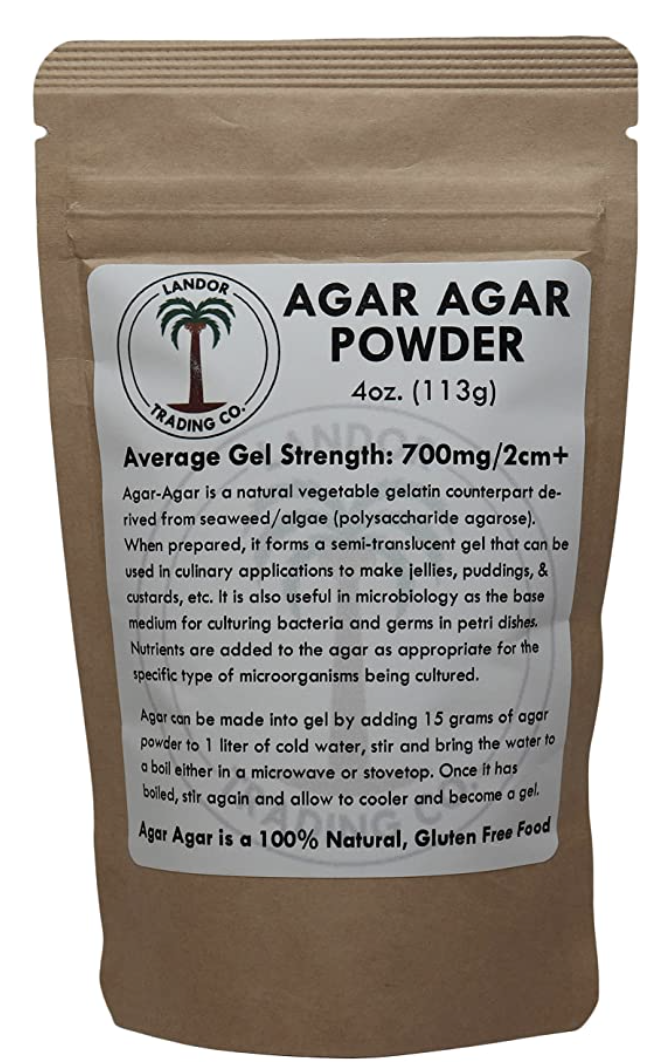
During our live Cooking Show we experimented with 3 kinds of agar:
Miri usually uses a Thaï brand. You can find it from Korean food stores (Oriental Market 7101 Saint Denis St, Montreal, Quebec H2S 2S5),
but today she cooked with Landor Trading Co brand (strength 700) and Vanessa with the same brand (strength 900) both ordered on Amazon
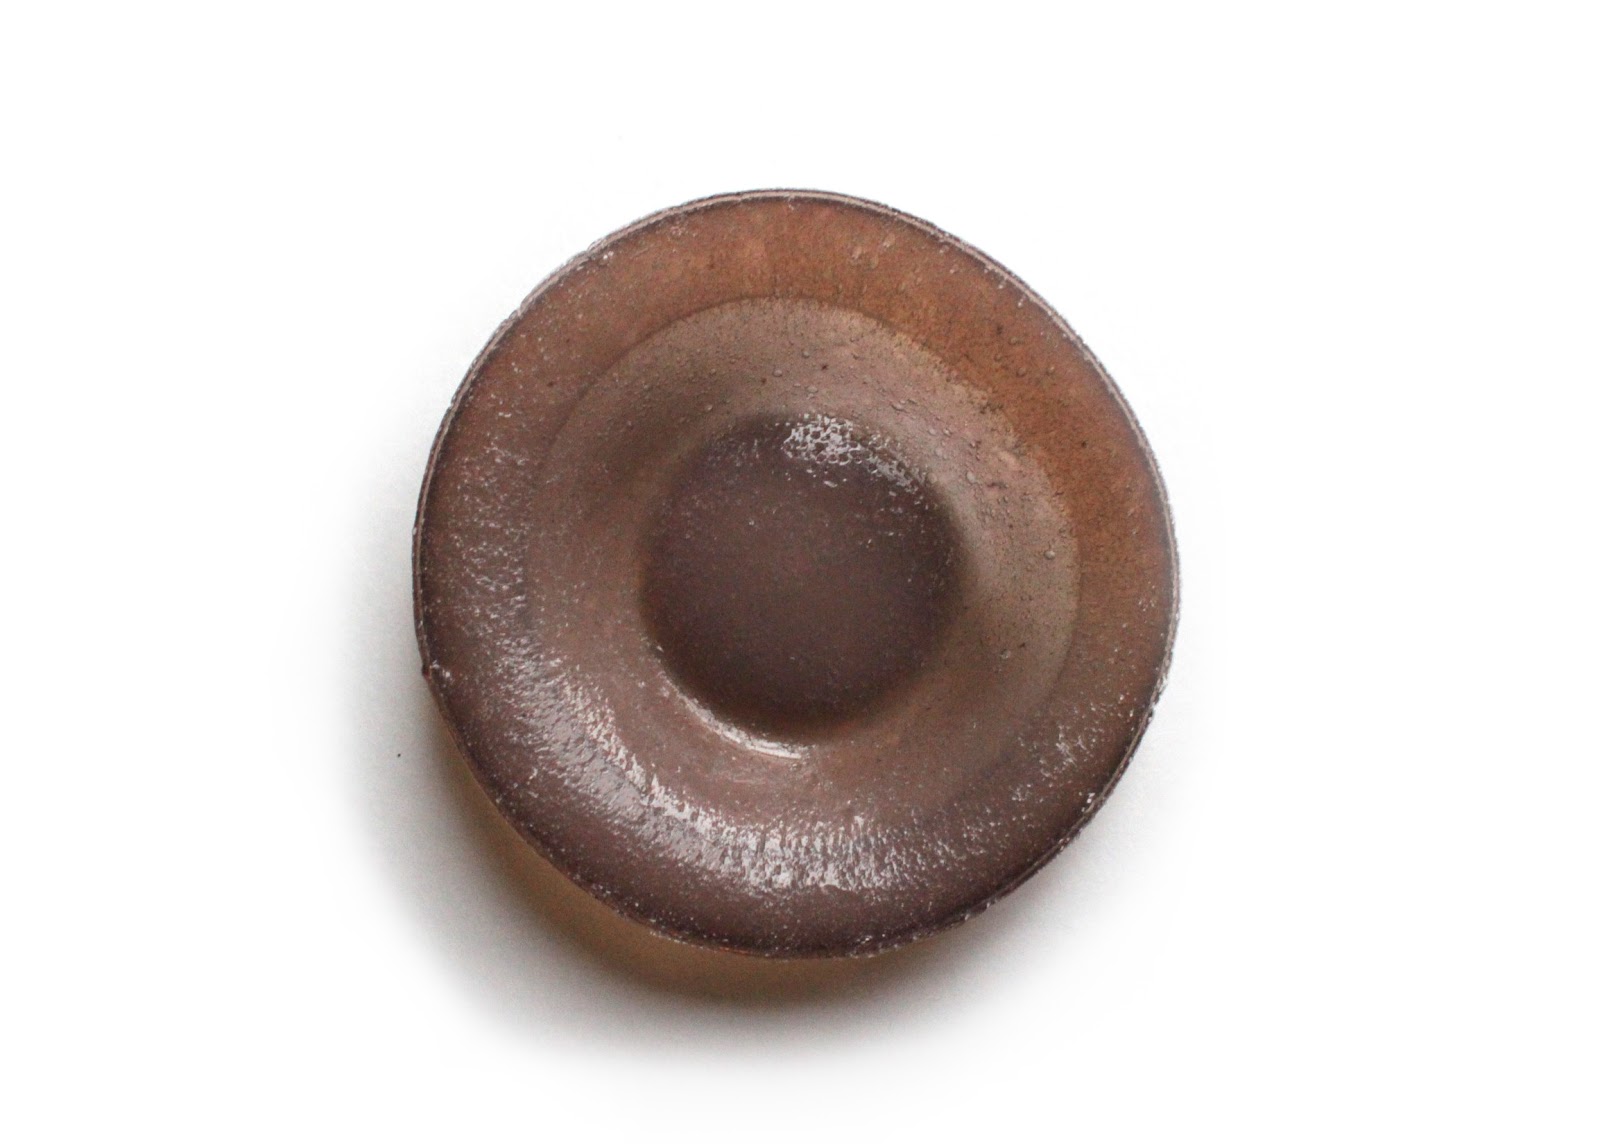
Alex cooked with Fisher BioReagents Agar. It is a lab-grade agar and is both expensive and difficult to get your hands on unless you’re part of a University or equivalent institution. I like to work with it primarily because I’m familiar with it. That being said, because it comes in a granulated form instead of a powder like the other two agars we used, it takes a long time to completely dissolve (and you may need to add a bit more water partway through the slow cooking process). What I like most about it is that it partners well with gelatine and creates a stable hybrid with many of the good qualities that come with using either agar or gelatine.
Vanessa’s Recipe:
For 2 small plates or cups (yogourt lid size about 10cm)
- 4 g of agar
- 1 tsp of vegetable glycerine
- 150 ml of water
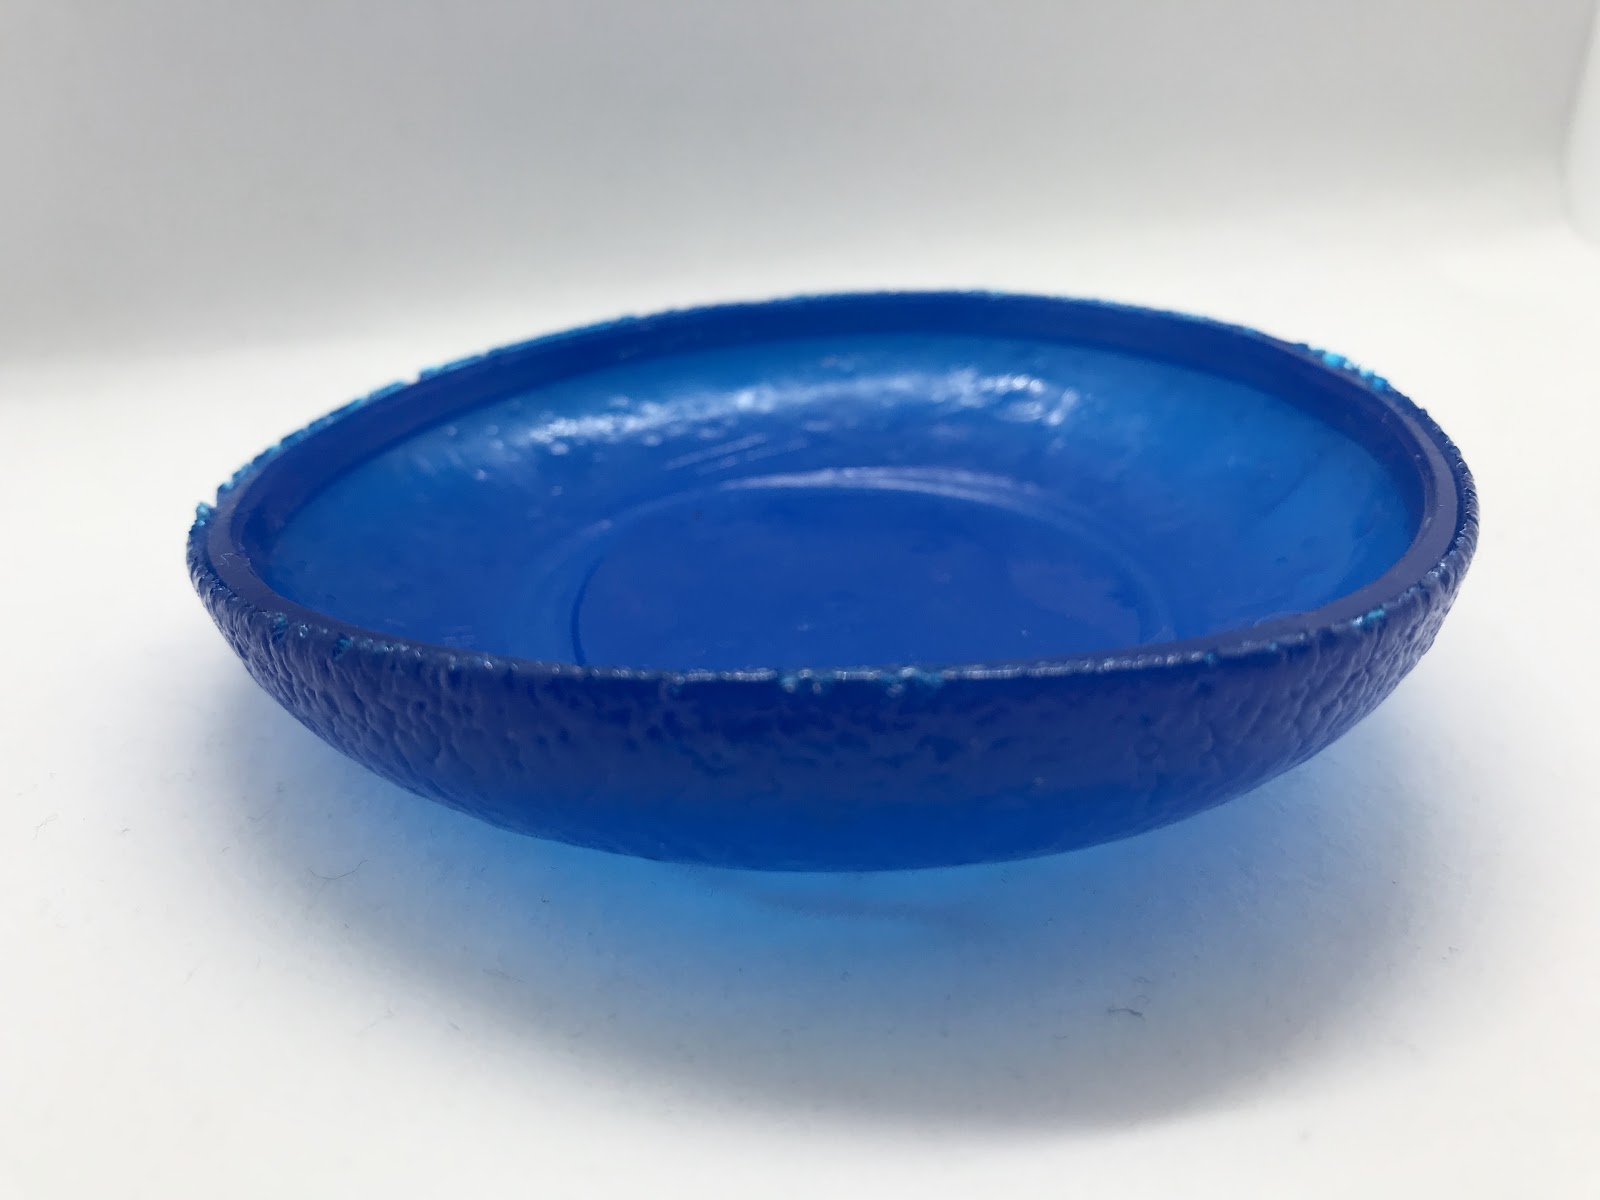
- 3 drops of blue food coloring
Alex’s Recipe:
During our cooking show, this recipe made enough bioplastic to fill one medium-sized round tupperware lid:
- 4.5 g lab-grade Fisher BioRegents brand agar
- 3.75 g vegetable glycerine from Coop Coco
- 120 mL water
- Amaranth dye until I like the colour (~20 drops)
Mix the water and glycerine in a small pot. Turn the stove to medium (I used 4 out of 8 on my electric stove). Gently sprinkle the agar on top and stir it in. Bring it to 95C—or just below boiling—and then turn it down to low. The whole process may take up to 30 minutes since it takes so long for the granulated agar to fully dissolve. If you notice that the consistency of the material starts to thicken too much before the agar has dissolved, you may need to add a little bit more water (a TBSP at a time should do). When it’s done, remove from heat, add your colouring, and let it sit for a couple minutes so that the bubbles can settle before pouring it into the mould.
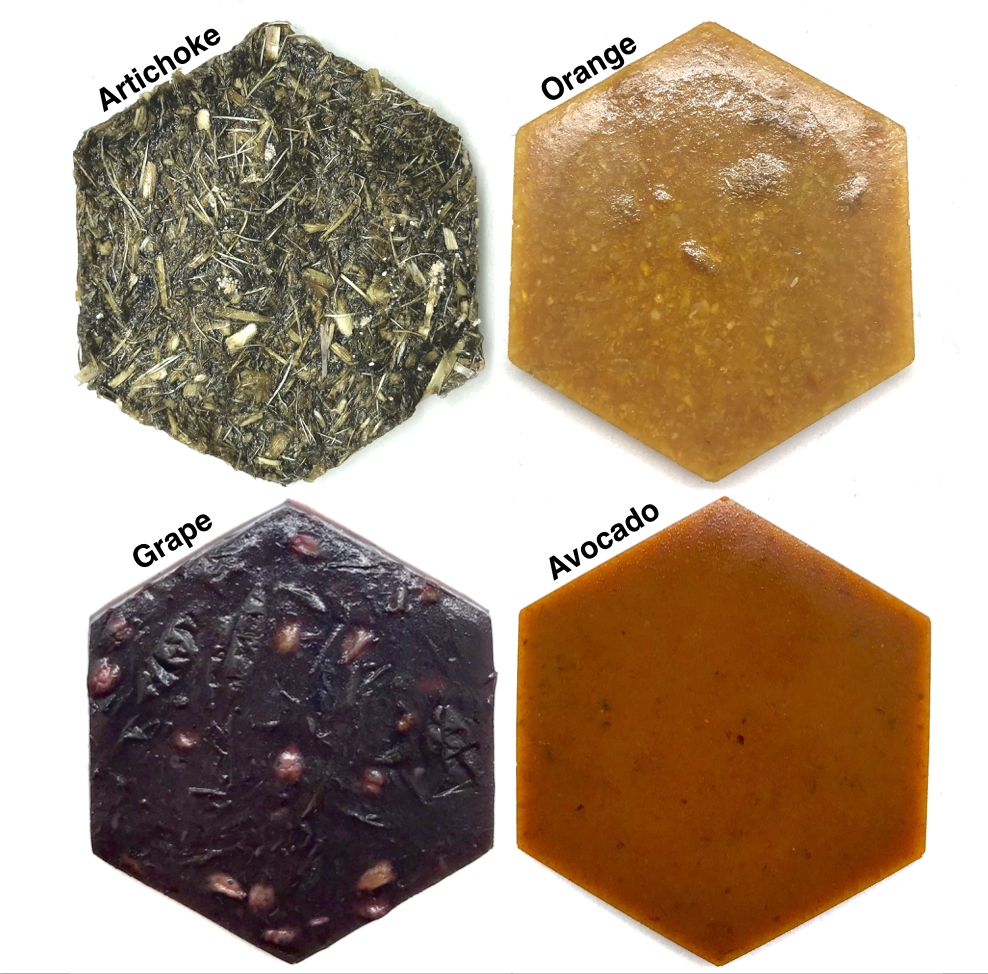
Below is an example using lab-grade agar and natural concord grape dye. As you can see, the texture isn’t quite as even as the results using powdered agar. There are still a few undissolved granules in the material.
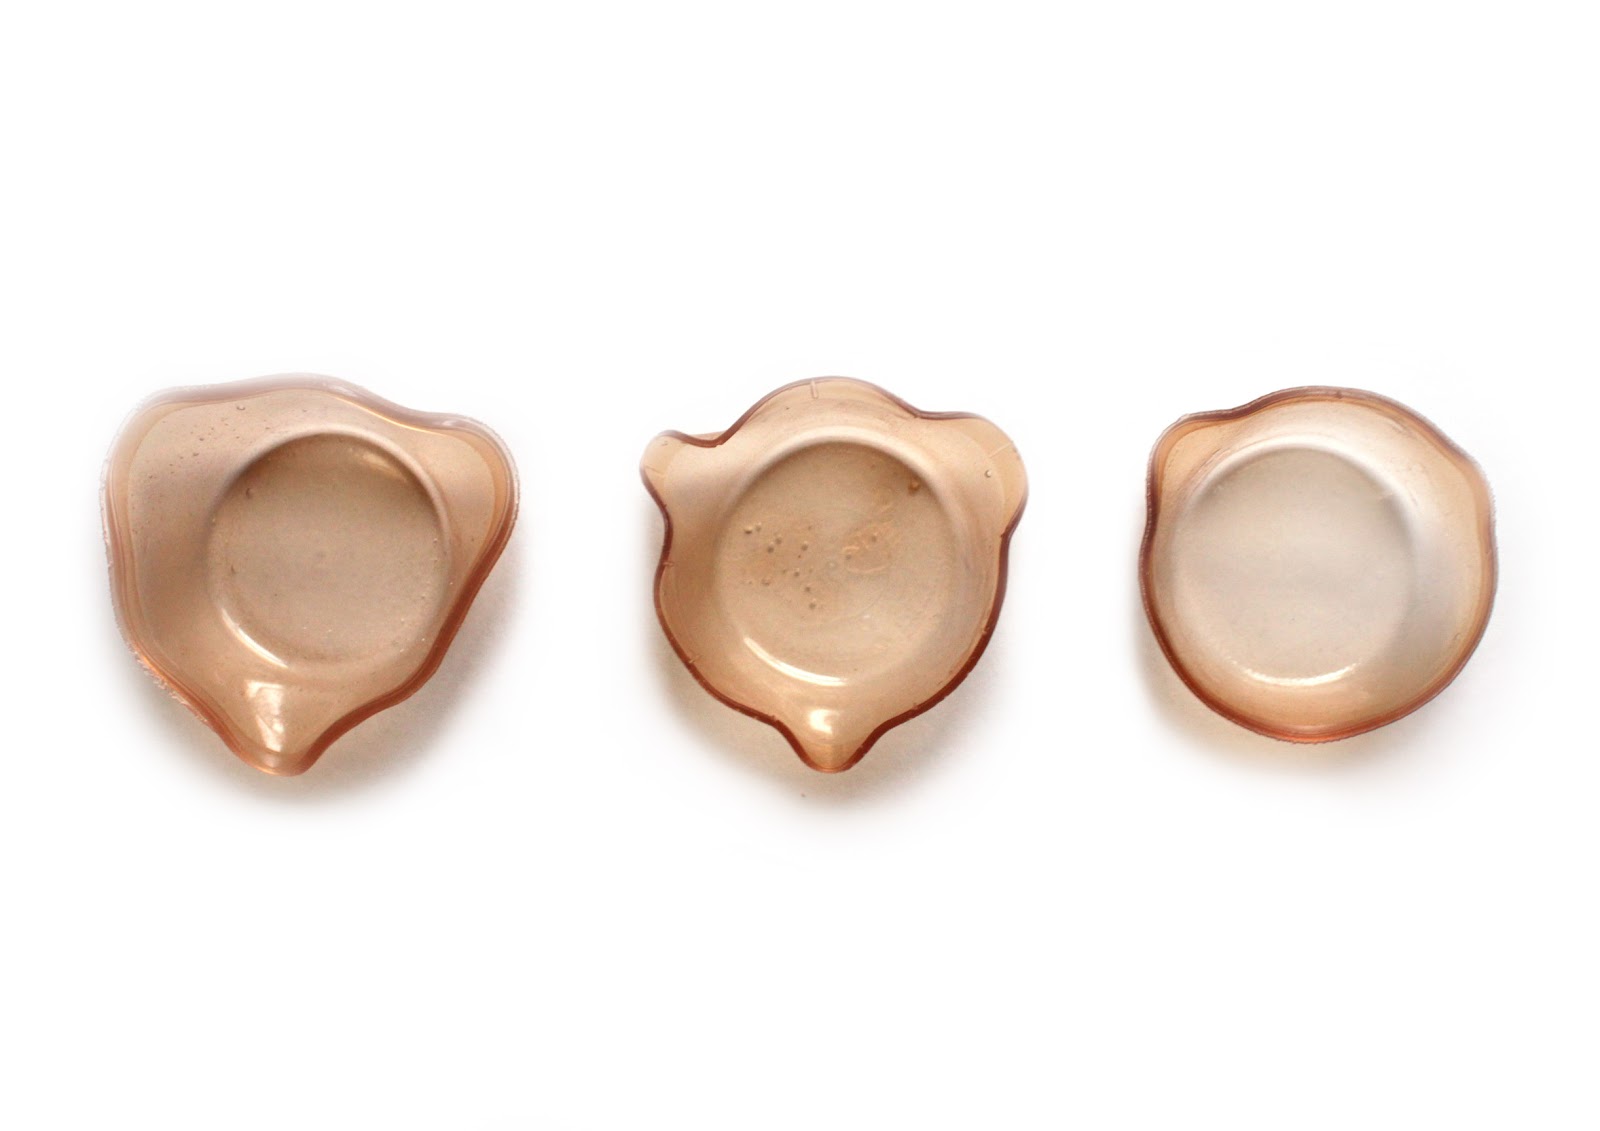
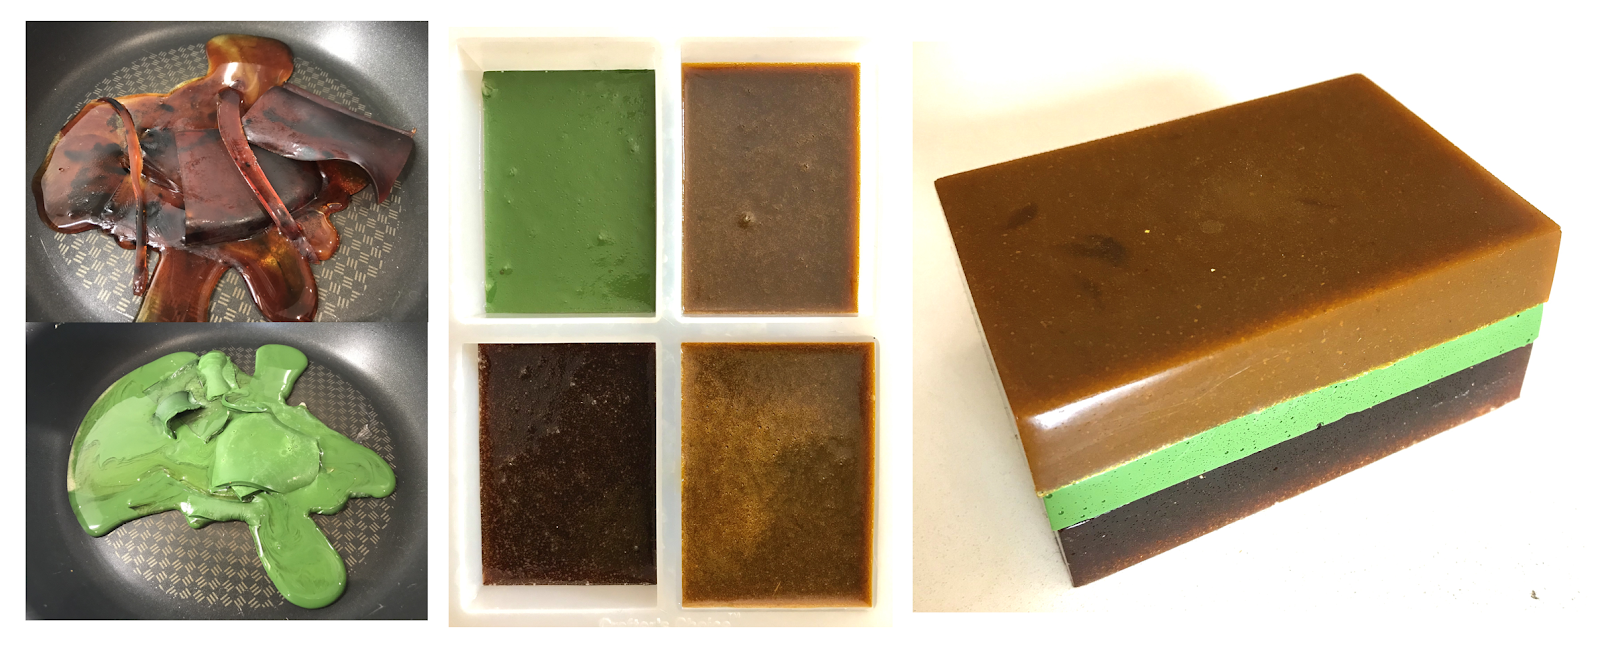
To give an example on how glycerine can affect an agar recipe, I made several slightly smaller batches and varied the amount. Each batch used 4 g of agar (Landor Trading Co brand, 900 strength), 80 mL of water, and 15 drops of homemade amaranth dye. This was enough liquid to fill two yogurt lids halfway, which is less than I usually fill them.
This image shows the difference between using 10 g of glycerine (left), 5 g of glycerine (middle), and 2.5 g glycerine (right). When you use more glycerine, you can achieve a more pliable bioplastic with less overall shrinkage. When you use less glycerine, you get a more rigid material (better for tableware), but it shrinks a lot. If you use too much glycerine, you’ll likely end up with a material that never fully dries and remains somewhat tacky. If you use too little glycerine, your material will be more prone to cracking and breakage. This photo was taken with approximately 1 week of drying.
Miri’s recipe:
For two small yogurt lids
- 4 gr of agar agar (Landor Trading Co brand strength 700)
- 1 teaspoon of Glycerine
- 125 ml water
Cook for about 20 min on very low heat, until a consistent thicker texture
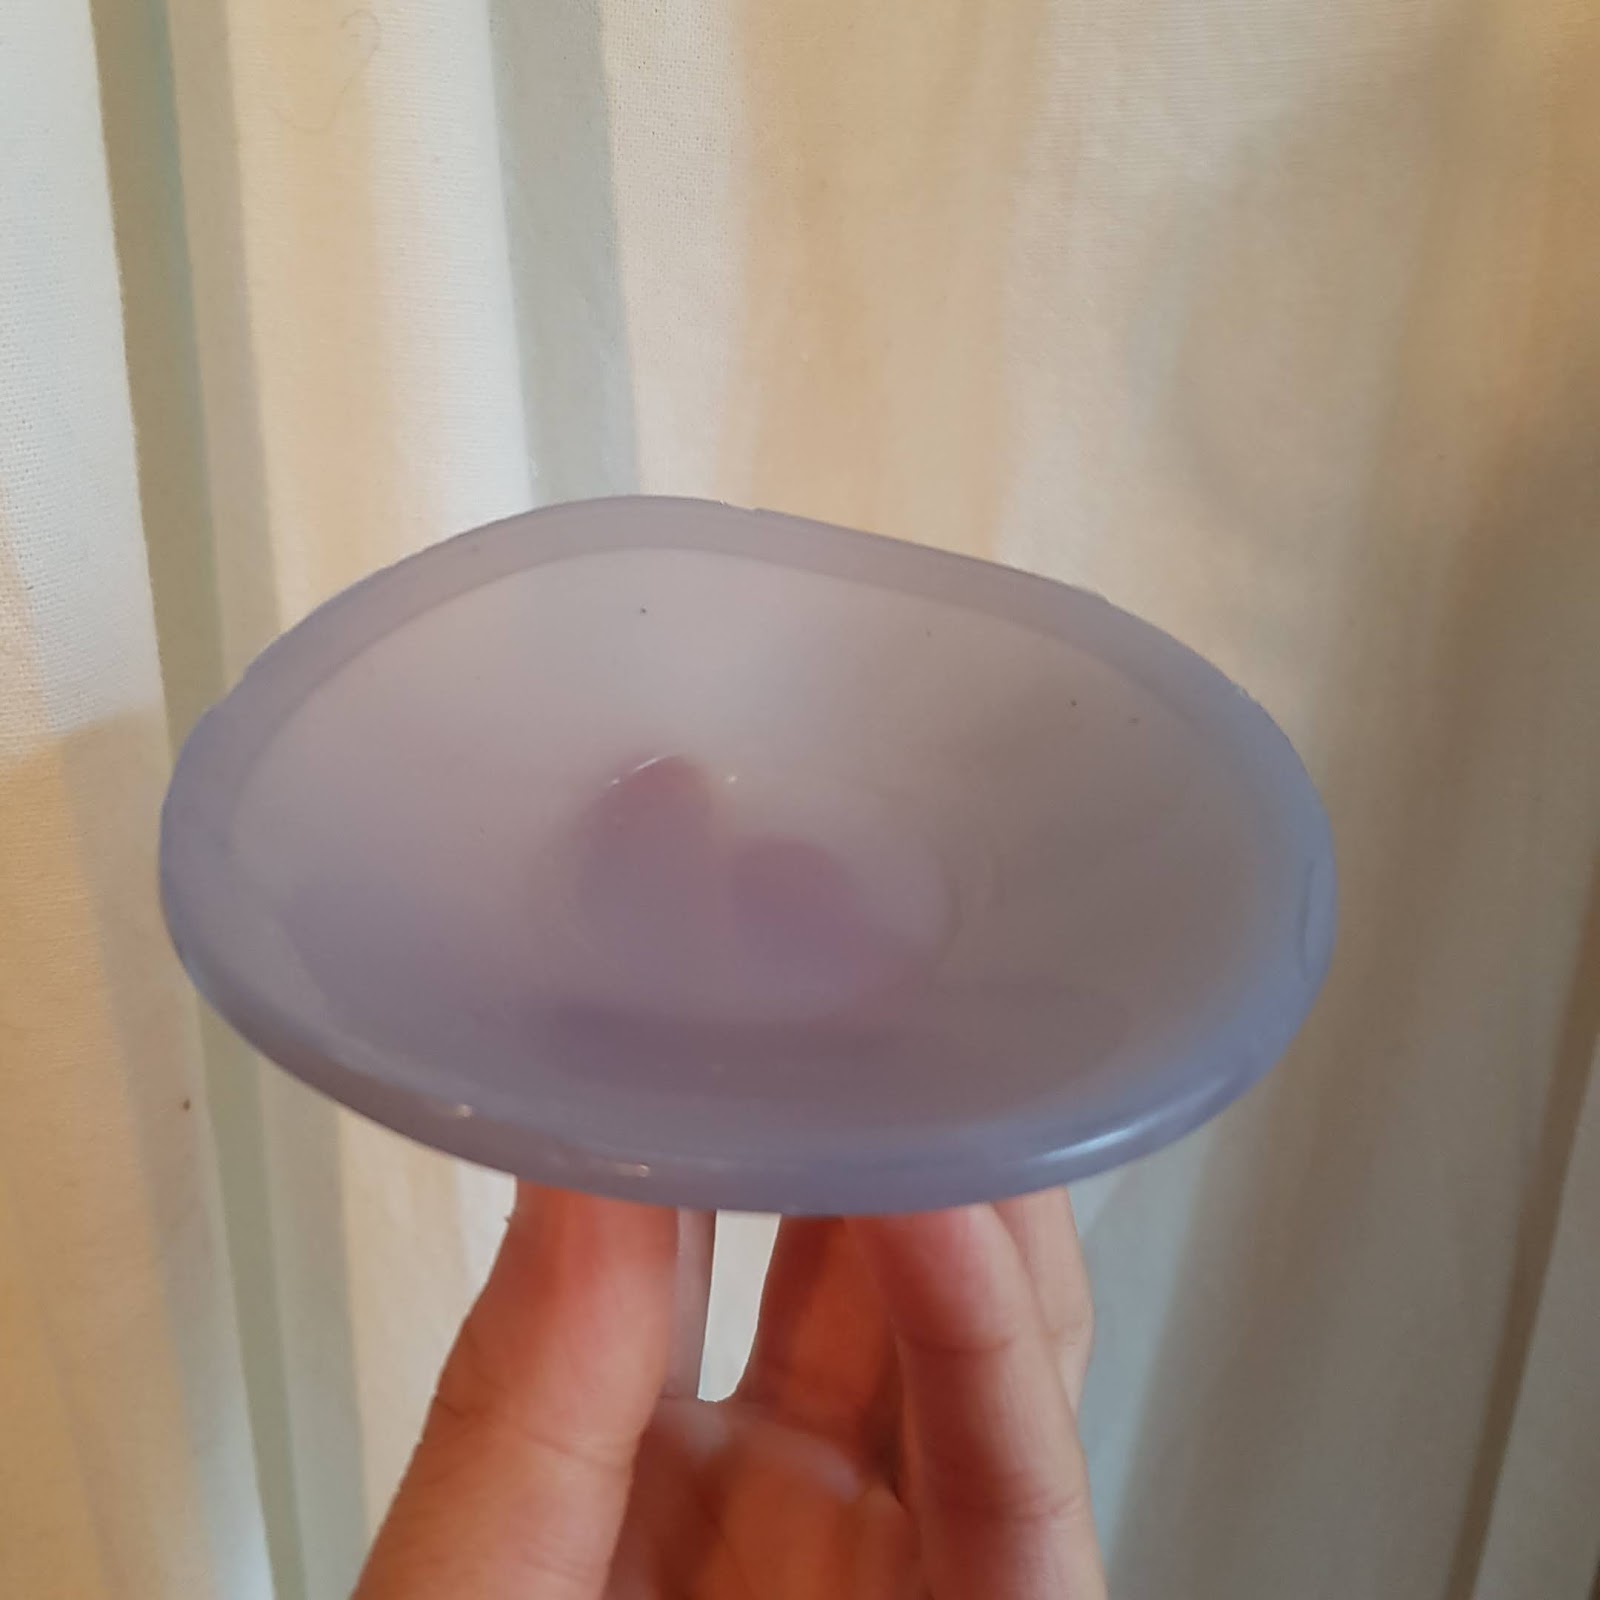
I let it cool down for a little bit before adding 3 small syringes of red cabbage sauerkraut juice. The result is a lavender colour.
A beautiful tool to keep record and enjoy the balance between rigor and intuition we really recommend using Airtable airtable.com, especially if you wish to work in collaboration at a distance.
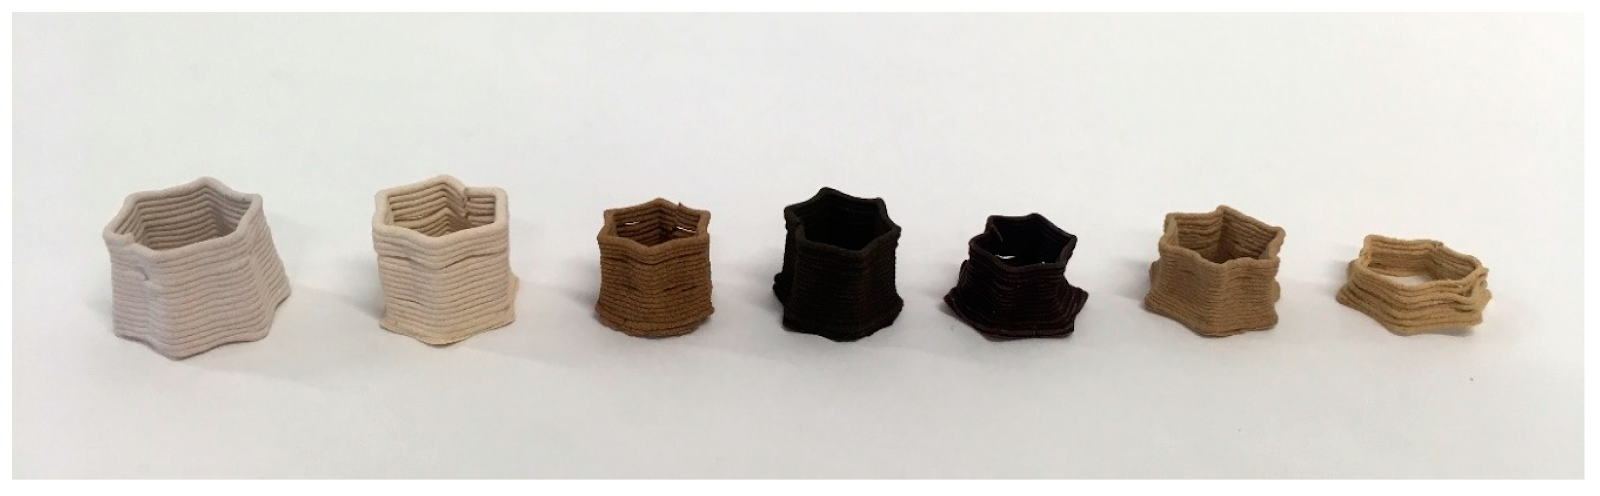
The sky's the limit with this kind of research, there are so many interesting technologies that incorporate bioplastics such as 3D printing.
(in the photo; design by Joost Vette)
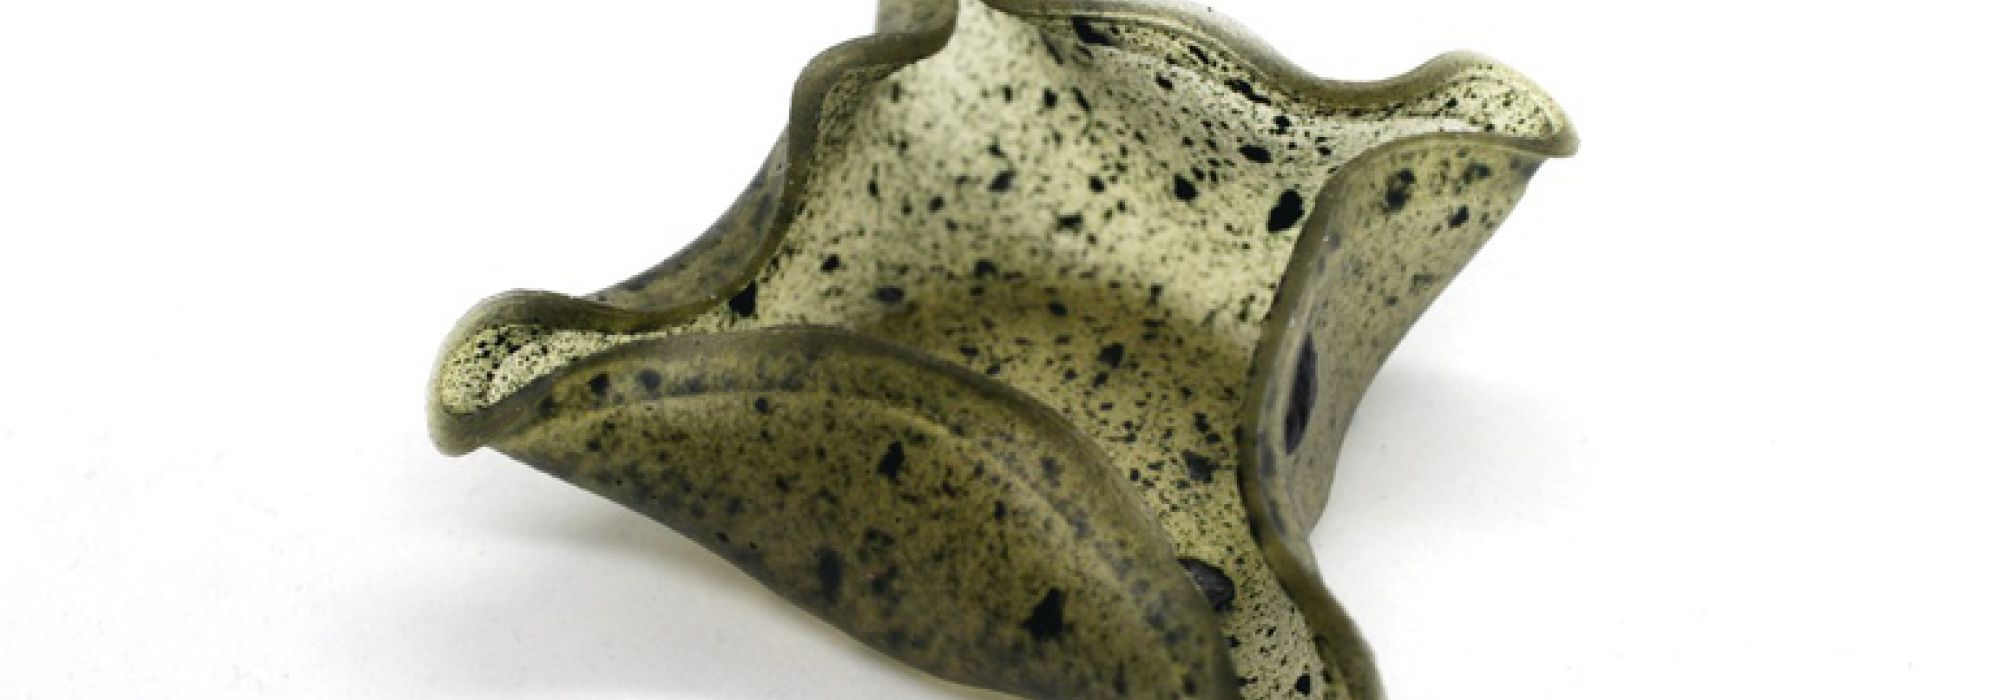
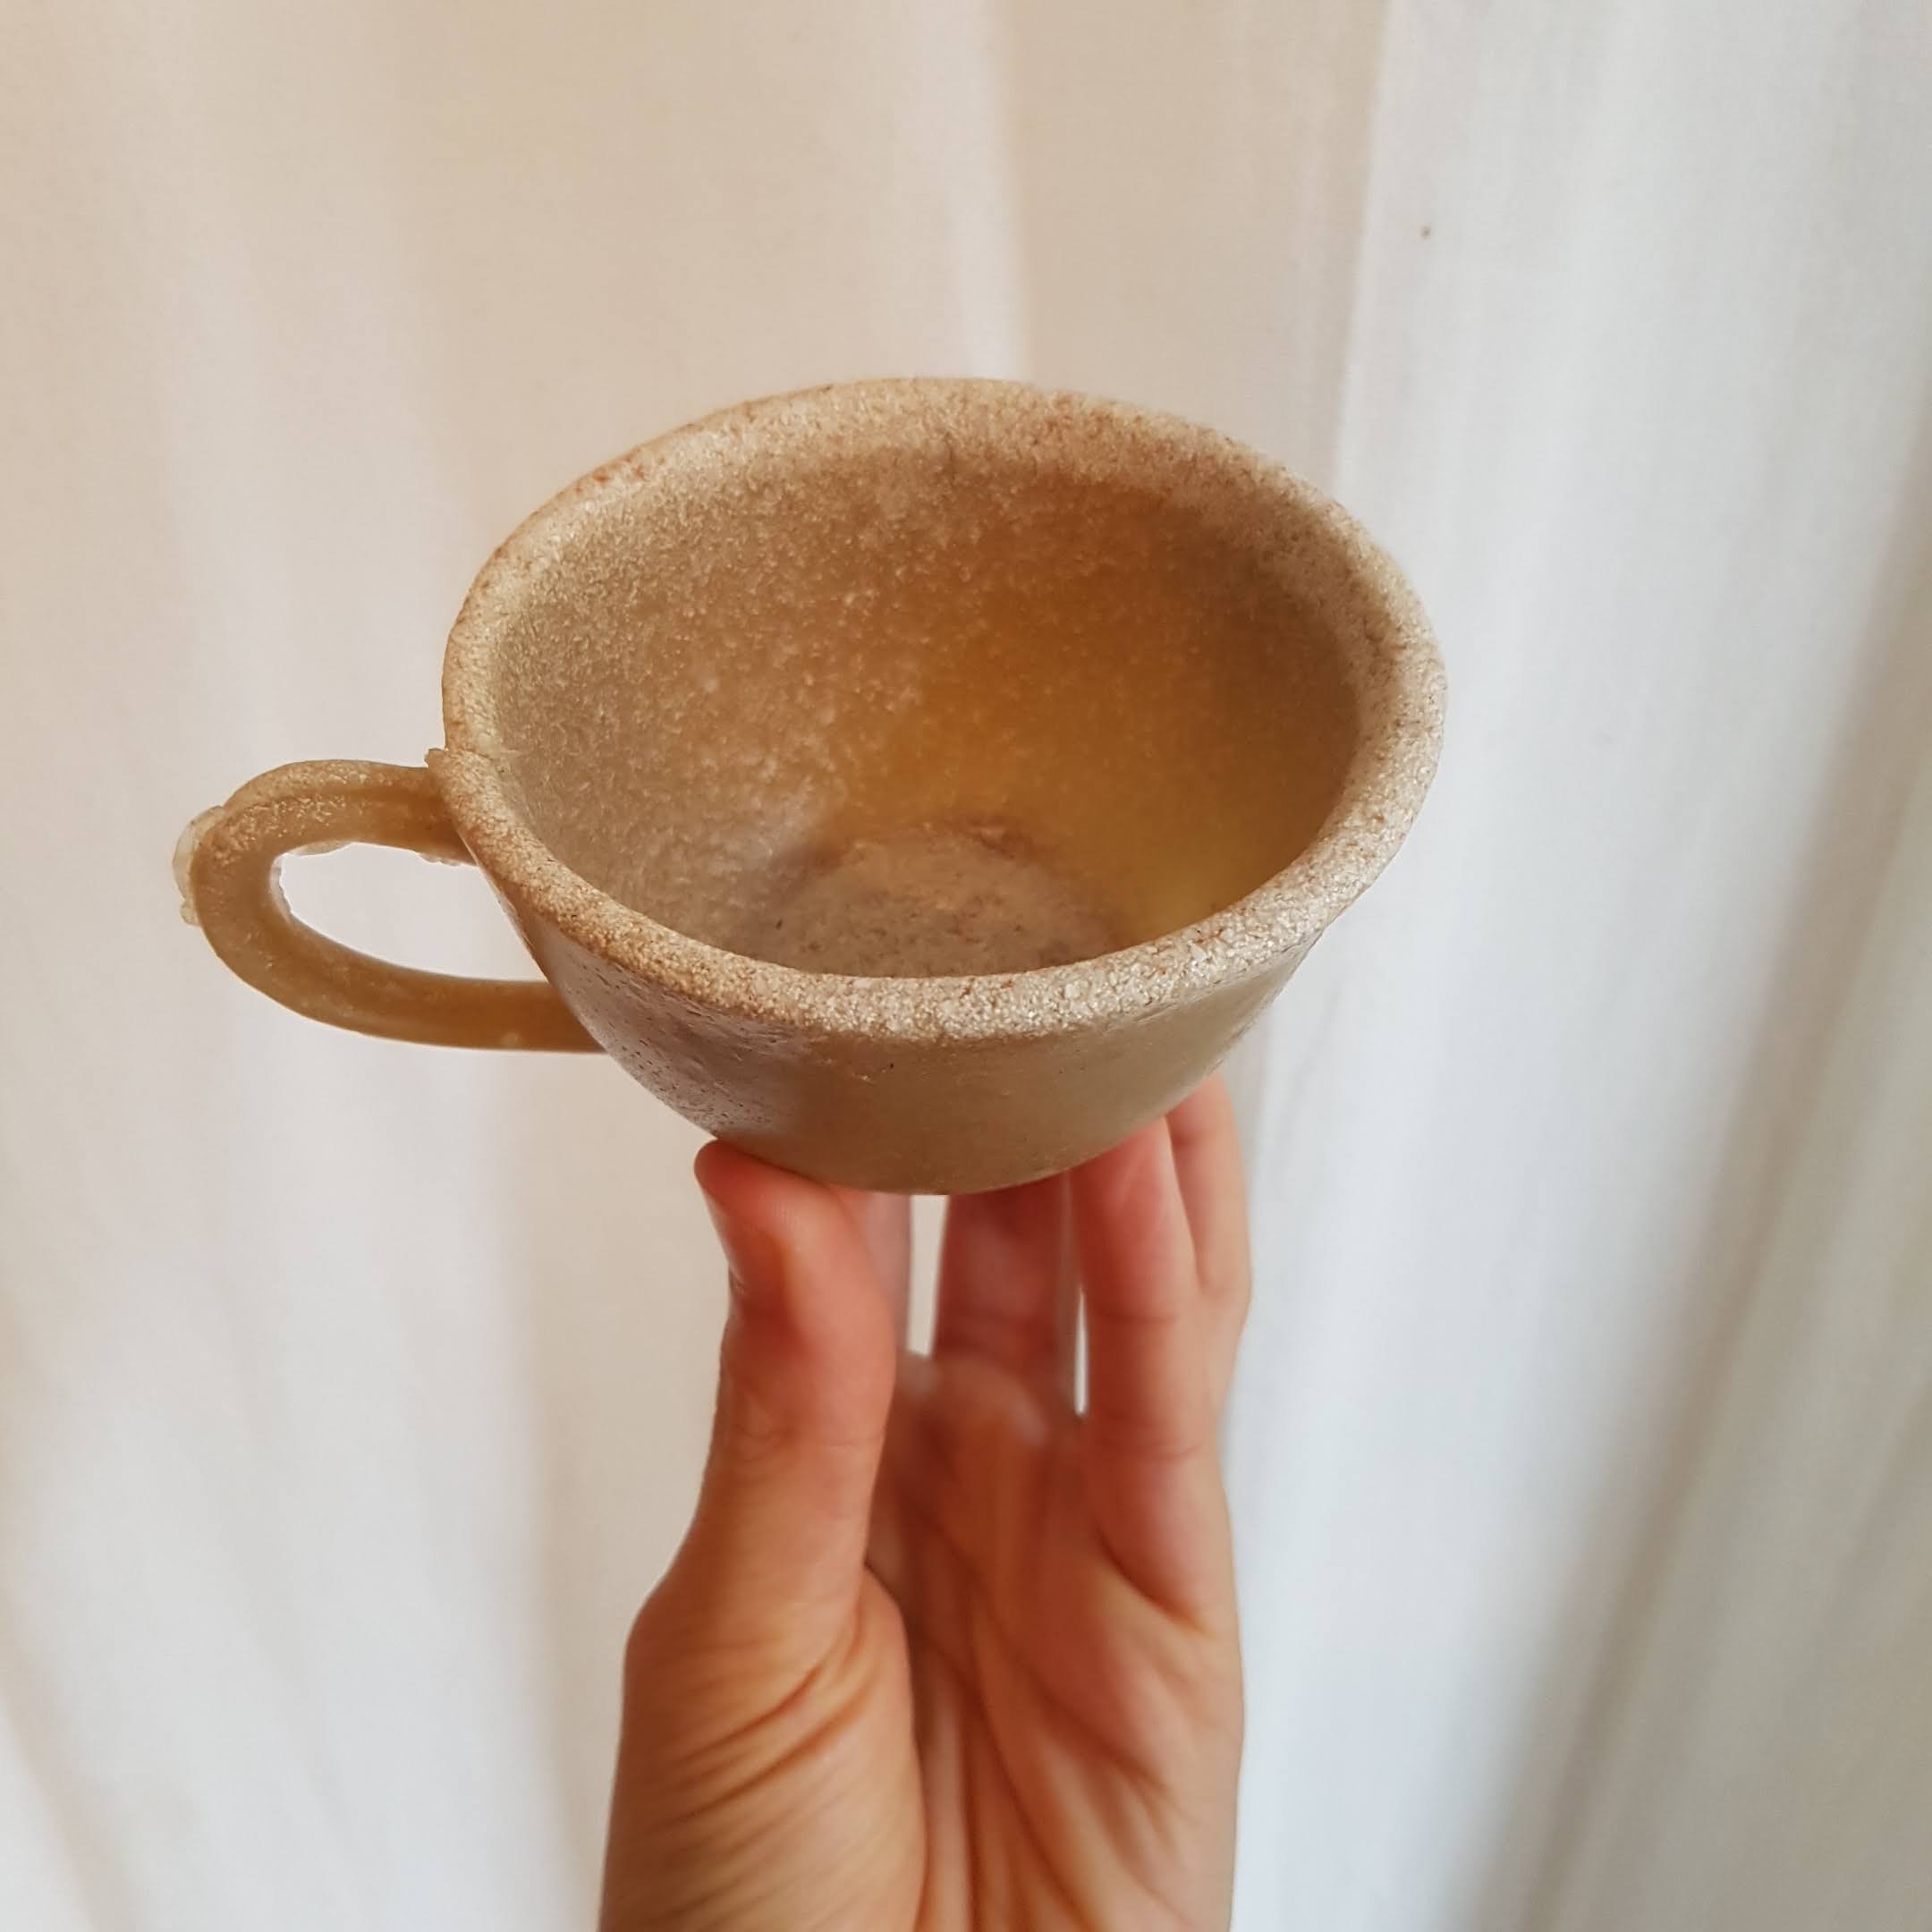
Incorporating techniques like molding and sculpting can expand the possibilities of shaping the materials.
Mold made by Mark Prent (RIP). We hope you enjoyed the conversation as much as we did. Thank you for participating, exploring and asking questions, we hope you continue to enjoy experimenting and researching. We look forward to sharing further experiments and seeing what you create and how your own process develops.
Dont hesitate to reach out, we would love to hear from you.
To stay in touch, follow us on instagram: @cyclical_matters.
Alex, Miri and Vanessa.